How to Add a Product in WooCommerce for WordPress: A Detailed Guide
Adding products to your WooCommerce store in WordPress is a crucial step in setting up your e-commerce website. This guide will take you through the process step-by-step, ensuring you can easily add and manage your products.
Step 1: Install and Activate WooCommerce
The first step therefore involves installing and activating WooCommerce on the preferred platform.
The very first step that you need to take is to Download and activate WooCommerce plugin.
However, to add products, you would wish to know, first of all, whether WooCommerce is installed and activated within the WordPress site you are using.
- Navigate to Plugins: To install the plugin you should go to your WordPress control panel, move your cursor over the “Plugins” and then click on “Install New” link.Search for WooCommerce:
- Search for WooCommerce: In the search input field simply type ‘WooCommerce. ’
- Install and Activate: Look at the plugins for WooCommerce, download, after it appeared at the plugins click “Install Now” and after it appears, click “Activate. ”
Step 2: Access the WooCommerce Product Page
Go to WooCommerce Product – It is the next place where you need to find the product and edit some of its properties.
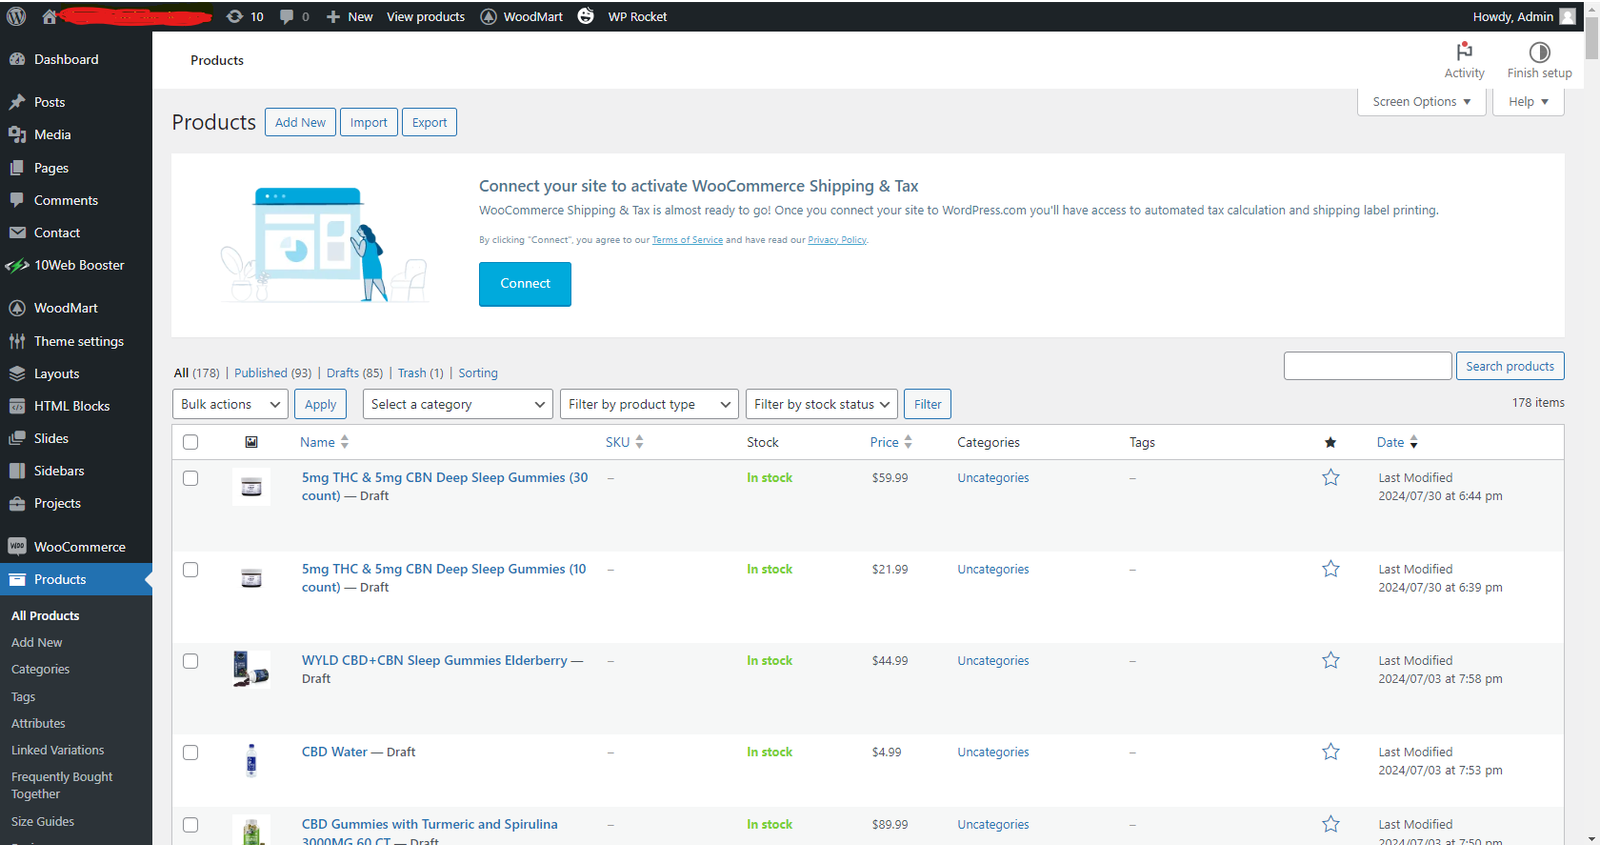
- Navigate to Products: Again on your WordPress dashboard, navigate to WooCommerce and click on Products which you will find in the drop-down list.
- Add New Product: To add new products click on “Add New”.
Step 3: Title and Description
In the next step, the subject needs to supply the Product Title and Description.
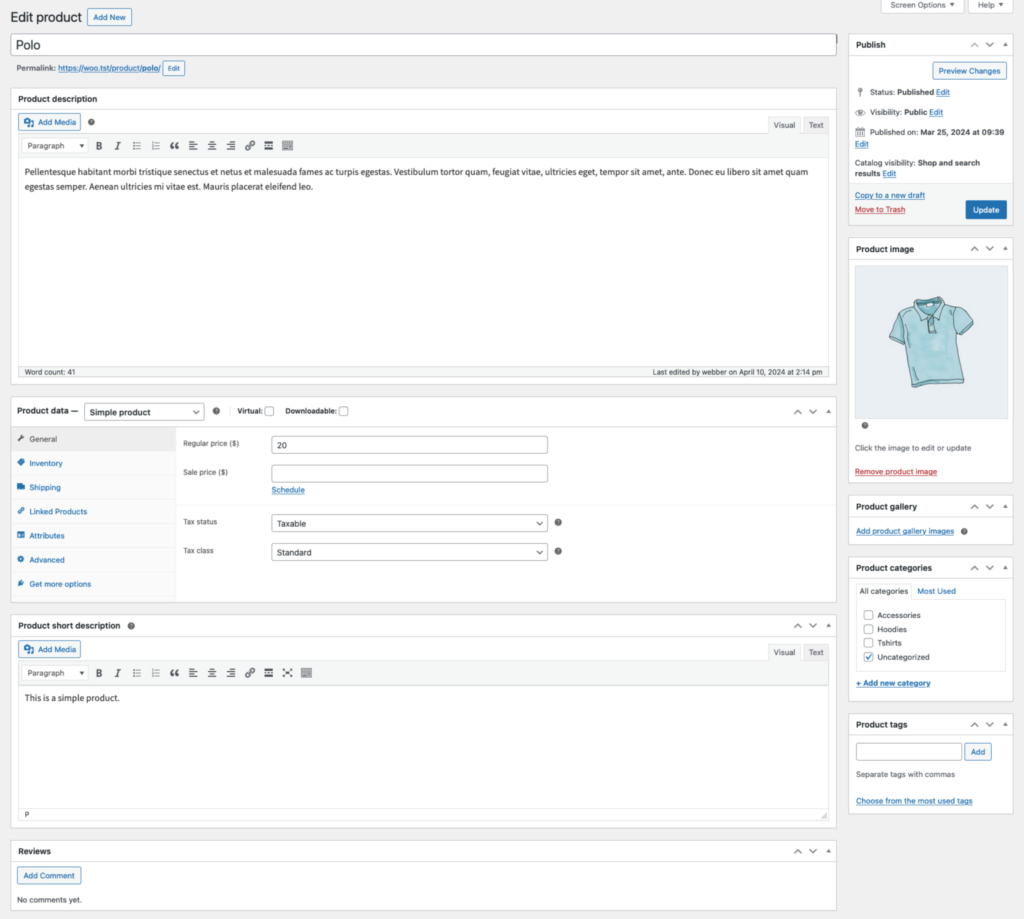
- Product Title: Fill in the “Product Name” field with the name of your product.
- Product Description: Type a thorough explanation of your product in the main text editor box. This is the area where you can talk about the uses and advantages of the product as well as any possible changes.
Step 4: Configure Product Data
Another name for Step 4 in the framework is “Configure Product Data.”
The primary text editor is immediately beneath the “Product Data” section. This is actually the section where you outline all of the product’s fundamental details.
- General Tab:
- Regular Price: Regular Price: In this instance, the final field to be filled out is the product’s regular price.
- Sale Price: Please enter the product’s sale price if it is currently on sale. If you would rather hold the sale on a different date, you may also schedule it for specific dates.
- Inventory Tab:
- SKU: SKU: Enter the stock keeping unit (SKU), if applicable.
- Stock Status: Control product and stock levels to determine whether a product is “in stock” or “out of stock.” or ‘Back ordered’.
- Sold Individually: Choose this option if you want to stop someone from making multiple orders for the same item.
- Shipping Tab:
- Weight and Dimensions: Enter the following fields to add the weight and dimension values.
- Shipping Class: If you have set up shipping classes, provide a shipping class.
- Linked Products Tab:
- Upsells: Replacing the product the viewer is now viewing with another product you recommend.
- Cross-sells: Products that you recommend adding to the cart based on the current item.
- Attributes Tab:
- Custom Product Attribute: It is also necessary to specify custom attributes, such as color, size, etc., for products that are variable.
- Variations Tab: After configuring attributes, you can add options to this tab if your product has any, including size and color.
- Advanced Tab:
- Purchase Note: Buying Note: After the item is purchased, a note for the customer must also be added.
- Menu Order: This product has a special ordering rank.
Step 5: Add Short Product Description
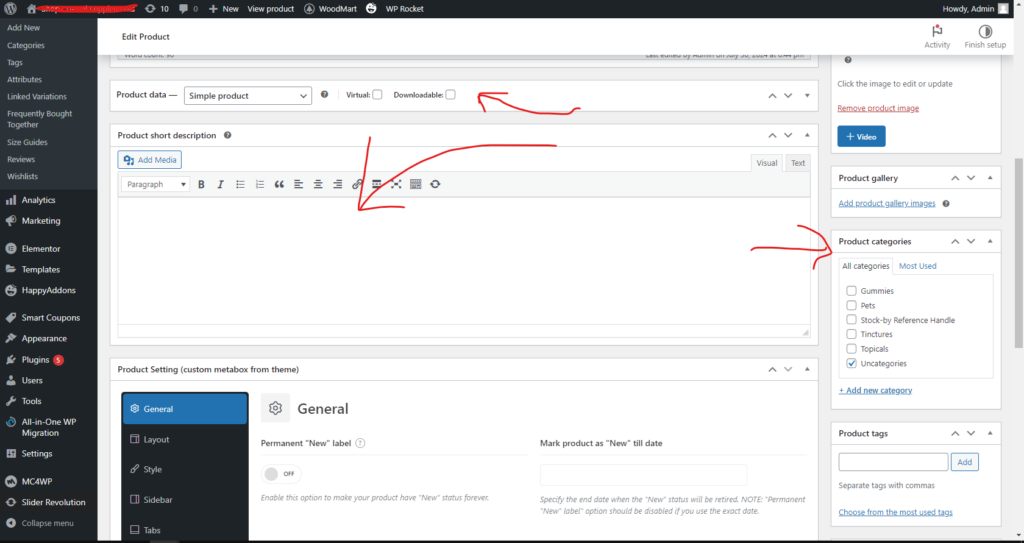
Short product description that includes all the details of the product should be added.
The short description is one that is incorporated in the product listing pages and in the main product description page, usually right next to the image of the product. In the “Product short description” editor, add a short and engaging message.
Step 6: Set Product Categories and Tags
Product Categories and Tags are established during the sixth step of implementing the Analytic model.
- Product Categories: On the same side at the right, you can classify your product into one or more categories. This assists in product categorization and ease of use by the users.
- Product Tags: Optimize your product by adding tags which will make your product easily visible.
Step 7: Add Product Images
- Product Image: his is the main picture of your product. Once you have chosen or uploaded a picture from your library, select “Set product image.”
- Product Gallery: To create a gallery, add more images. This is useful for showcasing the product in multiple ways or iterations.
Step 8: Publish Your Product
Your product is prepared for publishing once all required fields have been filled out.
- Publish: Click the “Publish” button on the right to activate your product on your website.

Additional Tips
- Product SEO: To make your product pages more search engine friendly, use an SEO plugin such as Yoast SEO.
- Product Reviews: To gain the trust of prospective clients, allow product reviews.
- Coupons and Discounts: Make use of WooCommerce’s coupon feature to provide sales and special discounts.
You may effectively add products to your WooCommerce store by following these instructions. Effective product management will improve the usability of your store and boost sales. Professionals can help you further, or you can review WooCommerce’s comprehensive documentation.
Cheers to your successful sales!