Blog

  • How to Secure Your WordPress Site from Hackers

    How to Secure Your WordPress Site from Hackers

    WordPress is a popular platform, powering over 43% of all websites. Its widespread use makes it a frequent target for hackers. To protect your site and ensure its integrity, implementing robust security measures is essential. Here are ten detailed tips to enhance your WordPress security and defend against potential threats:

    1. Keep Everything Updated

    One of the simplest yet most effective ways to protect your WordPress site is by keeping everything up to date. Outdated WordPress core files, themes, and plugins can have security vulnerabilities that hackers exploit.

    Detailed Steps:

    • WordPress Core: Regularly check for updates in your WordPress dashboard under Dashboard > Updates and apply them as soon as they are available.
    • Themes and Plugins: Go to Appearance > Themes and Plugins to see if there are updates. While automatic updates are an option, it’s recommended to update manually. This approach allows you to review each update and ensure that new versions don’t introduce bugs or slow down your site. Use the ‘Manage Updates’ button to help in the process, and always test your site after applying updates to ensure everything is functioning correctly.

    2. Implement Two-Factor Authentication (2FA) and Use Strong Passwords

    Why It’s Important: To provide access, Two Factor Authentication (2FA) verifies that there is another form of identity other than the password. It takes a long time for an attacker to use intimidation tactics to gain access to a system with complex passwords.

    Detailed Steps:

    • Strong Passwords: Select passwords that include a minimum of 12 characters and, ideally, a combination of capital and lowercase letters, numbers, and symbols. Avoid selecting easy passwords like “admin” or “password123.”
    • 2FA Plugins: Installing a 2FA plugin—such as Wordfence Security, Google Authenticator, or Two Factor Authentication—is the second step. After installation, the plugin functions and the setup instructions must be used to configure 2FA for users.

    3. Install a Security Plugin

    Why It’s Important: This type of plugin has the possibility of offering a wide range of security features such as firewalls, scanners for malware, and login security.

    Detailed Steps:

    • Choosing a Plugin:  Some of the top and most reliable security plugins to use include Wordfence Security, Sucuri Security, or iThemes Security.
    • Configuration: Once installed it is recommended to adjust the plugin settings to have active options like firewall, threat detection in real-time, as well as scheduling security checks now and then. Refer always to the plugin’s documentation for proper usage as well as for more details on how to install the plugin.

    4. Limit Login Attempts

    Why It’s Important: The general concept is borrowed with minor modification from a security feature known as “three strikes and you are out” that can be effective in stopping security risk known as the brute force attack in which the attacker tries as many passwords as possible in the hope that he or she will guess a popular password.

    Detailed Steps:

    • Install Plugin:  Make use of a plugin like Login LockDown or Limit Login Attempts Reloaded. You may install and enable the plugin using the WordPress dashboard’s Plugins section.
    • Configuration: Select the maximum number of permitted login attempts and the length of the lockout period for IP addresses that surpass this restriction in the plugin’s settings.

    5. Use SSL Certificates and HTTPS

    Why It’s Important: The use of HTTPS guarantees that all data transferred between your website and its users is secured and safe from manipulation or interception.

    Detailed Steps:

    • Obtain SSL Certificate: To obtain an SSL certificate, get in touch with your hosting company. Let’s Encrypt provides free SSL certificates to a lot of hosts.

    Force HTTPS: To enforce HTTPS on your website after installing the SSL certificate, modify your.htaccess file or use a plugin like Really Simple SSL. Make sure that HTTPS is being used by the WordPress site address (URL) and WordPress address (URL) by updating the WordPress settings under Settings > General.

    6. Regularly Backup Your Site

    Why It’s Important: Having regular backups guarantees that, in the case of a data loss or security compromise, you can return your website to its prior configuration.

    Detailed Steps:

    • Backup Plugins: Install a backup plugin, such as BackWPup or UpdraftPlus.

    Configuration: Plan frequent backups (every day or every week) and select a safe place to store the data, like a server or cloud storage like Google Drive or Dropbox. Check that backups are being produced correctly, and try occasionally restoring from a backup.

    7. Disable XML-RPC

    Why It’s Important: XML-RPC can be exploited for brute force and DDoS attacks if not properly secured. Disabling it can reduce these risks.

    Detailed Steps:

    • Add Code to .htaccess: Insert the following code into your .htaccess file to disable XML-RPC:
      • # Disable XML-RPC
      • <Files xmlrpc.php>
      • Order Allow, Deny
      • Deny from all
      • </Files>
    • Alternatively, Use a Plugin: Install a plugin like Disable XML-RPC to turn off XML-RPC functionality.

    8. Set Correct File Permissions

    Why It’s Important: By restricting access to your website’s files to authorized users only, you can utilize the appropriate file permissions to protect them against unauthorized changes.  

    Detailed Steps:

    • Permissions for the File: Assign the directory permissions of 755 (readable, writable, and executable by the owner, readable and executable by others) and the file permissions of 644 (readable and writable by the owner, readable by others). To change permissions as necessary, use an FTP client or your hosting control panel.

    9. Use Anti-Malware Scanners

    Why It’s Important: Anti-malware scanners detect and remove malicious software that could compromise your site.

    Detailed Steps:

    • Install Anti-Malware Plugin: Use a security plugin with malware scanning capabilities, such as Wordfence or Sucuri.
    • Configuration: Configure the plugin to perform regular scans of your site and set up alerts for any detected threats. Review scan results and take action to remove any identified malware.

    10. Educate Your Team

    Why It’s Important: By teaching staff members about security procedures, you may be able to prevent errors that could put your website at risk.

    Detailed Steps:

    • Training: Give advice or instruction on the most effective WordPress security measures. Ensure that every website user is aware of the significance of security precautions and how to adhere to them.

    Keep Up to Date: Stay informed about the most recent security issues and upgrades. Urge team members to remain up to date on the latest security developments and dangers.

    11. Remove Unused WordPress Plugins and Themes

    It might be dangerous for your WordPress website’s security to have outdated or underused plugins and themes. Hackers may use outdated themes and plugins to access your website and make it more susceptible to intrusions.

    To Remove an Unused WordPress Plugin:

    1. Navigate to Plugins: In your WordPress admin panel, select Plugins > Installed Plugins.
    2. Delete the Plugin: If the plugin is active, locate it and select Deactivate to delete it. The plugin can then be deleted from your website by selecting Delete next to its name.

    Note: The delete option will only appear after you deactivate the plugin.

    How to Eliminate an Unused Theme:

    1. Go to Themes: Select Appearance > Themes from the WordPress admin panel.  
    2. Choose a theme: To view the specifics of a theme, click on the one you want to remove.
    3. Delete the Theme: Select the Delete button in the lower-right corner of the pop-up window that displays.

    Note: Be careful not to remove the active theme, please.

    Regularly cleaning up unused plugins and themes not only improves site performance but also reduces potential security vulnerabilities.

    Conclusion

    Securing your WordPress site involves a combination of proactive and reactive measures to protect it from potential threats. By implementing these ten detailed practices, you can significantly enhance your site’s security and reduce its vulnerability to hackers. Start applying these measures today to safeguard your WordPress site and ensure its ongoing protection.

  • How to Fix WordPress’s White Screen of Death (WSOD): A Step-by-Step Guide

    How to Fix WordPress’s White Screen of Death (WSOD): A Step-by-Step Guide

    The white screen of death (WSOD) is undoubtedly one of the most common WordPress issues. It is also a frustrating error because
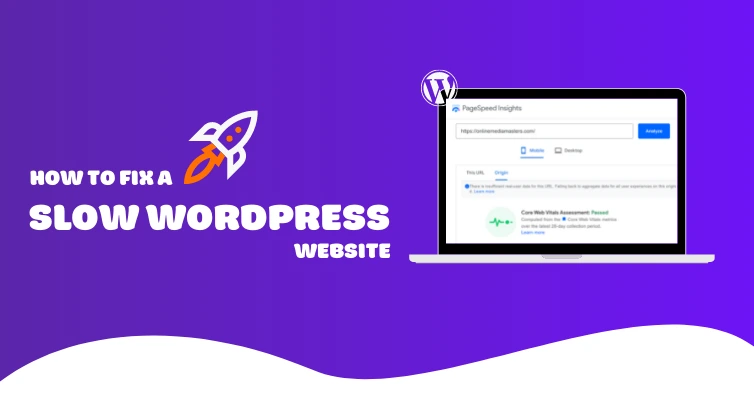
 there is no message, and you are locked out of WordPress, this message shows that even when working online, sometimes you can be locked out of your WordPress account without any message.
    The other issue that is associated with the white screen of death error is that it may only manifest in specific sections of your site, sometimes. For instance, it is possible to encounter the white screen of death only when you are in the WordPress admin area but the rest of the site is functional. Other scenarios are various- you may only come across it once in a while or you may only notice it when it is on a specific post.
    The cause of this problem can be attributed to plugin conflict, improper functioning of the theme, and PHP error. So if you are completely stuck and staring at a white screen wondering what to do, then fear not; below is a step by step solution for your problem.

    This might be possible causes of encountering the WordPress White Screen of Death (WSoD) error:

    • PHP code level errors
    • Memory limit exhaustion
    • Plugin and theme incompatibility
    • Corrupted plugin or theme
    • Server-level issues

    1. Enable Debugging

    Why It Helps: Enabling debugging in WordPress can reveal the errors causing the WSOD, making it easier to identify and fix the issue.

    How to Do It:

    1. Access Your wp-config.php File: Connect to your site via FTP or your hosting provider’s file manager.
    2. Edit the File: Open wp-config.php and locate the line that says /* That’s all, stop editing! Happy blogging. */.
    3. Add or Modify the Following Lines:
    1. Save Changes: This configuration will create a debug.log file in your wp-content directory where errors will be logged.
    2. Check the debug.log File: Look for errors that could indicate the source of the problem. This file will give you clues about what might be going wrong.

    2. Deactivate Plugins

    Why It Helps: The WSOD often results from a malfunctioning plugin on the Windows operating system. Disabling them can make you know if it is the plugin causing the issue.

    How to Do It:

    1. Access Your Site via FTP: Access using a FTP application or your hosting company’s file browser.
    2. Navigate to Plugins Directory: It is under wp-content folder and the directory is plugins.
    3. Rename the Plugins Folder: Renaming the folder to plugins_old, here we are only dealing with plugins in the new folder structure. This will disable all plugins to be more specific.
    4. Check Your Site: If you go to your site and the full plugins folder does not load, then rename the folder back to plugins and activate the plugins one at a time until there is that one plugin that causes the issue.

    3 Switch to Default Theme

    Why It Helps:At other times, it could be as simple as some issues with the previously engaged theme. Switching to the default theme for a while can assist you determine whether the issue is with the theme.

    How to Do It:

    1. Access Your Themes Directory: Go to wp-content/themes.
    2. Rename Your Active Theme’s Folder: Rename the folder of the currently active theme to any name as, for instance, theme_old.
    3. Check Your Site: WordPress should automatically switch to a default theme like Twenty Twenty-One. If this resolves the issue, your theme may be causing the problem.

    4. Increase PHP Memory Limit

    Memory issues are the last reason for the white screen of death. The limit to 128 MB is set by default. It is possible to raise it if your site uses a lot of media and executes massive scripts.

    • Fatal error: Allowed memory size to be exhausted.
    • Fatal error: The characteristics in composed messages can be included in a fatal error.

    To address this issue, it is advisable to change the extent of allowed memory. It allows the script to have more memory space and do some operations. You can use the file manager on the web hosting control panel to do this. The only difference between the two methods is how one gets to the files.

    Increasing the Memory Limit Using the File Manager

    1. Access Your wp-config.php File:
      • Use the File Manager on your hosting provider’s website or an FTP software to access your WordPress website.
      • Open the public_html folder from where you installed WordPress.
    2. Edit the File:
      • Find the file called “wp-config.php” and open it..
      • Before the comment that states, insert the following line.
      • php code
    1. Save Changes:
      • Close and save the “wp-config.php” file.
      • If the WSOD is caused by memory allocation, this will raise the RAM limit to 256 megabytes, which should help fix it.

    Why It Helps

    Yes, absence of memory component contributes to the WSOD. If the problem is related to the memory allocation then it could be solved by raising the PHP memory limit.

    For further guidance, you can refer to tutorials on how to increase PHP memory in WordPress, such as the one provided by WPCode. This ensures that you correctly apply the changes and avoid potential issues.

    5. Check Your Error Logs

    Why It’s Useful: Your server’s error logs can provide specific details about what’s going wrong.

    How to Do It:

    1. Access Error Logs: You can usually find these through your hosting provider’s control panel.
    2. Look for Specific Errors: Scan the logs for any error messages related to PHP issues, database problems, or server configuration
  • How to Fix Slow WordPress Performance: The Guidelines

    How to Fix Slow WordPress Performance: The Guidelines

    Slow loading WordPress site might cause irritation to the users, affect onsite factors of SEO and the performance of the site. Thankfully there are a number of measures that can be put in place to help increase your sites loading speed in turn helping the users. So in this guide I will show you how to determine and solve real problems of WordPress site performance and make your WP site work as fast as possible..

    1. Optimize Images

    Why It Matters: Large image files can significantly slow down your site. Optimizing images helps reduce their size without sacrificing quality, which speeds up load times.

    How to Optimize:

    • Compress Images: Use tools like TinyPNG or ImageOptim to reduce image file sizes before uploading them to your site.
    • Use Correct Formats: Choose the right image format. JPEG is good for photographs, while PNG is better for images with transparency. Consider using the WebP format for even smaller file sizes.
    • Responsive Images: Implement responsive images using the srcset attribute in HTML to serve appropriately sized images based on the user’s device.

    Plugins to Help:

    • Smush
    • ShortPixel
    1. Enable Caching

    Why It Matters: Caching stores a static version of your site’s pages, which reduces the need for the server to generate new pages each time a visitor arrives, speeding up load times.

    How to Enable Caching:

    • Install a Caching Plugin: Popular caching plugins include WP Super Cache, W3 Total Cache, and WP Rocket.
    • Configure Caching Settings: Adjust plugin settings to cache pages, minify files, and enable browser caching. Follow the plugin’s documentation for optimal configuration.
    1. Use a Content Delivery Network (CDN)

    Why It Matters: A CDN distributes your site’s static content (such as images, CSS, and JavaScript) across a network of servers worldwide, which reduces the distance between the user and your site’s content, improving load times.

    How to Use a CDN:

    • Choose a CDN Provider: Popular CDN providers include Cloudflare, KeyCDN, and StackPath.
    • Integrate with WordPress: Most CDN providers offer plugins or easy integration methods for WordPress. Follow the provider’s instructions to connect your site to the CDN.
    1. Minify CSS and JavaScript

    Why It Matters: Minification removes unnecessary characters (like whitespace and comments) from CSS and JavaScript files, reducing their size and improving load times.

    How to Minify:

    • Use Minification Plugins: Plugins like Autoptimize and WP Rocket can automatically minify and combine CSS and JavaScript files.
    • Manually Minify: For advanced users, you can manually minify files using tools like CSSNano and UglifyJS.
    1. Optimize Your Database

    Why It Matters: Why It Matters: Subsequently, your WordPress databases can encompass unwanted elements such as post revisions, spam comments and transient options leading to slow down of your website.

    How to Optimize:

    • Clean Up the Database: To clean and optimize the databases you need to use plugins such as WP-Optimize or Advanced Database Cleaner.
    • Regular Maintenance: Schedule some of your time for cleaning activities of the database to get them to an optimal state.
    1. Upgrade Your Hosting

    Why It Matters: Shared hosting environments can be slower due to resource limitations and high traffic on the same server. Upgrading to a higher-performance hosting solution can significantly improve site speed.

    How to Upgrade:

    • Choose a Better Hosting Plan: Consider upgrading to a managed WordPress hosting provider like WP Engine, or Hostinger.
    • Consider VPS or Dedicated Hosting: For high-traffic sites, a Virtual Private Server (VPS) or dedicated server might be necessary for optimal performance.
    1. Check for Slow Queries

    Why It Matters: Slow database queries can impact your site’s performance by delaying data retrieval and page generation.

    How to Check:

    • Install Query Monitor Plugin: The Query Monitor plugin helps identify slow database queries and other performance issues.
    • Optimize Queries: Review and optimize slow queries by examining the database structure and indexing. For complex issues, consider consulting a database expert.
    1. Remove Unnecessary Plugins and Themes

    These are the extensions that are not of any use for the user or the site, and that may potentially be causing errors and conflicts with other plugins and themes.

    Why It Matters: Too many plugins and themes slow down your site and affects the loading speed.

    How to Remove:

    • Deactivate Unused Plugins: In your WordPress installation go to the Plugins tab and disable all the plugins that you don’t need. Eliminate those plugins which are not useful to you anymore.
    • Delete Unused Themes: Under Appearance go to Themes and delete all the themes which you do not require. Remove Format that is no longer of use to you.

    Following such strategies you can address the problems or slow performance outcomes and boost the WordPress site speed. Daily and weekly checks, tweaking, and knowledge on matters of website optimization, and ways to avoid the common site mistakes will assist in the efficient performance of your site.

  • How to Add a Product in WooCommerce for WordPress: A Detailed Guide

    How to Add a Product in WooCommerce for WordPress: A Detailed Guide

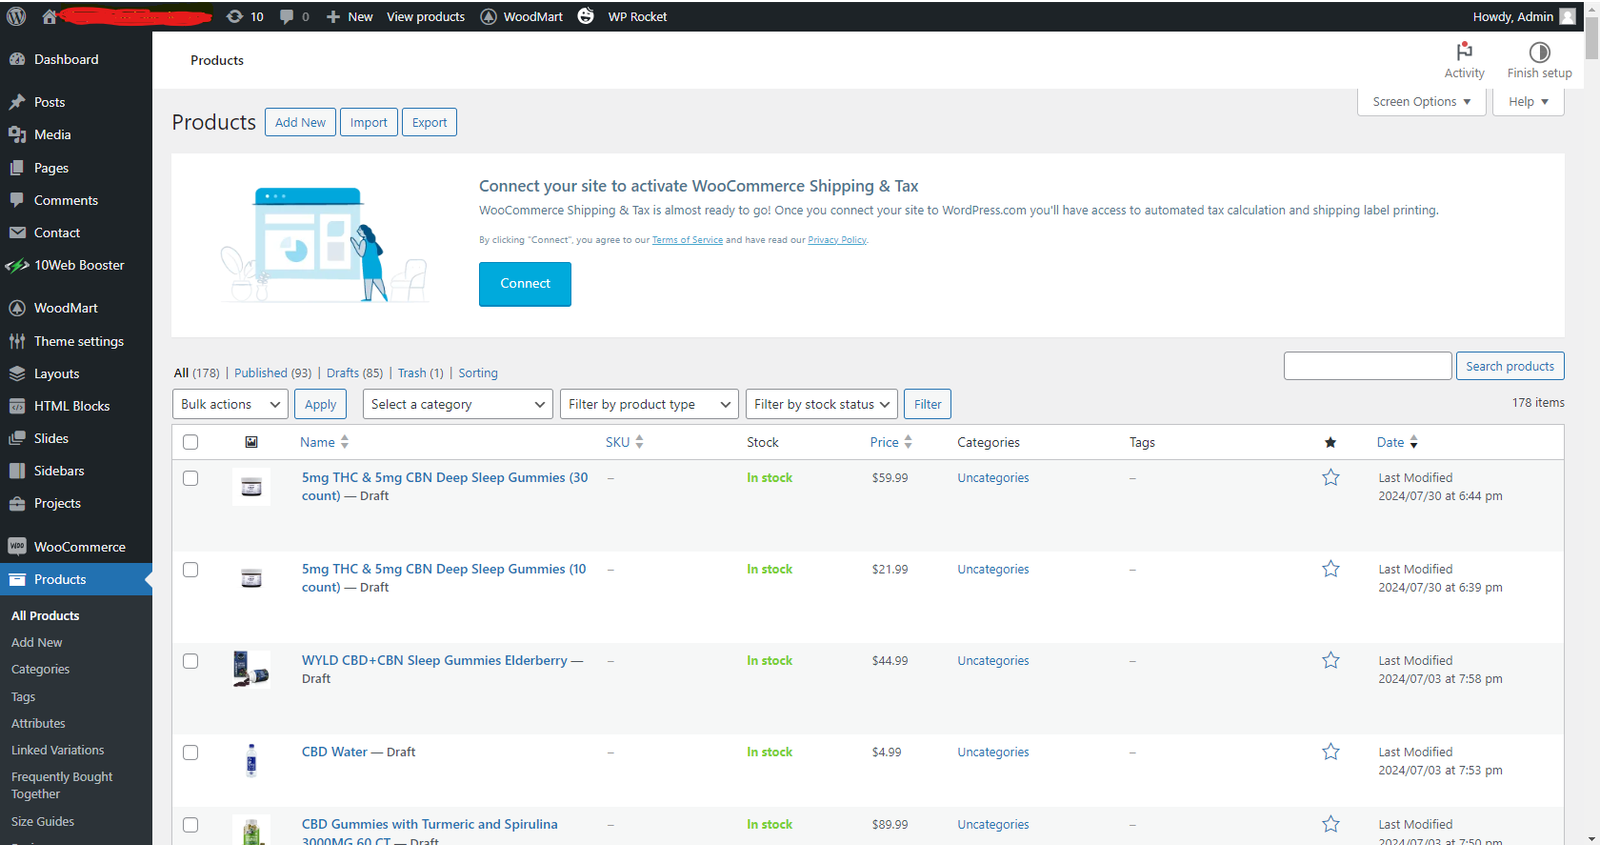
    Adding products to your WooCommerce store in WordPress is a crucial step in setting up your e-commerce website. This guide will take you through the process step-by-step, ensuring you can easily add and manage your products.

    Step 1: Install and Activate WooCommerce

    The first step therefore involves installing and activating WooCommerce on the preferred platform.
    The very first step that you need to take is to Download and activate WooCommerce plugin.
    However, to add products, you would wish to know, first of all, whether WooCommerce is installed and activated within the WordPress site you are using.

    1. Navigate to Plugins: To install the plugin you should go to your WordPress control panel, move your cursor over the “Plugins” and then click on “Install New” link.Search for WooCommerce:
    2. Search for WooCommerce: In the search input field simply type ‘WooCommerce. ’
    3. Install and Activate: Look at the plugins for WooCommerce, download, after it appeared at the plugins click “Install Now” and after it appears, click “Activate. ”

    Step 2: Access the WooCommerce Product Page

    Go to WooCommerce Product – It is the next place where you need to find the product and edit some of its properties.

    1. Navigate to Products: Again on your WordPress dashboard, navigate to WooCommerce and click on Products which you will find in the drop-down list.
    2. Add New Product: To add new products click on “Add New”.

    Step 3: Title and Description

    In the next step, the subject needs to supply the Product Title and Description.

    1. Product Title: Fill in the “Product Name” field with the name of your product.
    2. Product Description: Type a thorough explanation of your product in the main text editor box. This is the area where you can talk about the uses and advantages of the product as well as any possible changes.

    Step 4: Configure Product Data

    Another name for Step 4 in the framework is “Configure Product Data.”
    The primary text editor is immediately beneath the “Product Data” section. This is actually the section where you outline all of the product’s fundamental details.

    1. General Tab:
      • Regular Price: Regular Price: In this instance, the final field to be filled out is the product’s regular price.
      • Sale Price: Please enter the product’s sale price if it is currently on sale. If you would rather hold the sale on a different date, you may also schedule it for specific dates.
    2. Inventory Tab:
      • SKU: SKU: Enter the stock keeping unit (SKU), if applicable.
      • Stock Status: Control product and stock levels to determine whether a product is “in stock” or “out of stock.” or ‘Back ordered’.
      • Sold Individually: Choose this option if you want to stop someone from making multiple orders for the same item.
    3. Shipping Tab:
      • Weight and Dimensions: Enter the following fields to add the weight and dimension values.
      • Shipping Class: If you have set up shipping classes, provide a shipping class.
    4. Linked Products Tab:
      • Upsells: Replacing the product the viewer is now viewing with another product you recommend.
      • Cross-sells: Products that you recommend adding to the cart based on the current item.
    5. Attributes Tab:
      • Custom Product Attribute: It is also necessary to specify custom attributes, such as color, size, etc., for products that are variable.
    6. Variations Tab: After configuring attributes, you can add options to this tab if your product has any, including size and color.
    7. Advanced Tab:
      • Purchase Note: Buying Note: After the item is purchased, a note for the customer must also be added.
      • Menu Order: This product has a special ordering rank.

    Step 5: Add Short Product Description

    Short product description that includes all the details of the product should be added.

    The short description is one that is incorporated in the product listing pages and in the main product description page, usually right next to the image of the product. In the “Product short description” editor, add a short and engaging message.

    Step 6: Set Product Categories and Tags

    Product Categories and Tags are established during the sixth step of implementing the Analytic model.

    1. Product Categories: On the same side at the right, you can classify your product into one or more categories. This assists in product categorization and ease of use by the users.
    2. Product Tags: Optimize your product by adding tags which will make your product easily visible.

    Step 7: Add Product Images

    1. Product Image: his is the main picture of your product. Once you have chosen or uploaded a picture from your library, select “Set product image.”
    2. Product Gallery: To create a gallery, add more images. This is useful for showcasing the product in multiple ways or iterations.

    Step 8: Publish Your Product

    Your product is prepared for publishing once all required fields have been filled out.

    1. Publish: Click the “Publish” button on the right to activate your product on your website.

    Additional Tips

    • Product SEO: To make your product pages more search engine friendly, use an SEO plugin such as Yoast SEO.
    • Product Reviews: To gain the trust of prospective clients, allow product reviews.
    • Coupons and Discounts: Make use of WooCommerce’s coupon feature to provide sales and special discounts.

    You may effectively add products to your WooCommerce store by following these instructions. Effective product management will improve the usability of your store and boost sales. Professionals can help you further, or you can review WooCommerce’s comprehensive documentation.

    Cheers to your successful sales!